What tool is needed for laying the laminate, except desire, hands and head
Installation of laminate floors is a simple job, they cope with it, even without special skills. However, a tool for laying laminate flooring is a factor that you cannot brush aside. In most cases, its presence affects the speed and quality of installation, but sometimes it becomes a key. In order not to stretch the repair, it is advisable to consider what equipment to prepare and how to replace it.
Each step of almost any job is divided into several operations. Given that there is no completely universal equipment, a specific operation needs its own tools. Therefore, before looking for something, choosing and buying, it is worthwhile to draw up an action plan.
The steps for laying a laminate are as follows:
- Surface preparation.
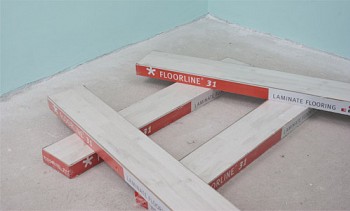
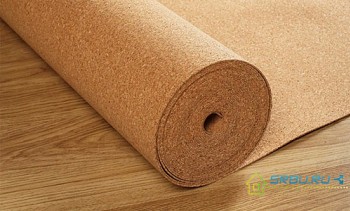
- Laying the substrate.
- Measurement and marking of panels.
- Cutting, processing of lamels.
- Laminate assembly.
- Installation of baseboards.
Surface preparation often comes down to cleaning the concrete screed to remove defects. It involves its own set of devices that are not related to the laminate. If the base is fairly even, it is usually simply primed and covered with a substrate. To spread the substrate, only one knife with retractable interchangeable blades is enough. However, further work will require more specific equipment.
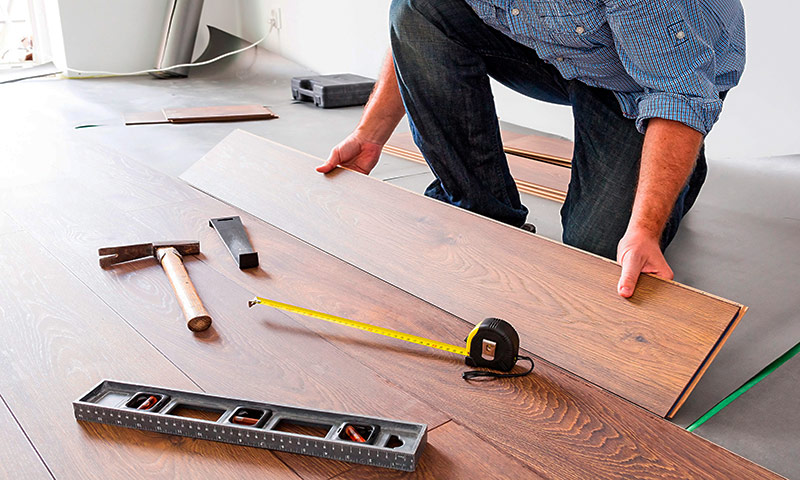
Tools for measuring and marking used in laying laminate
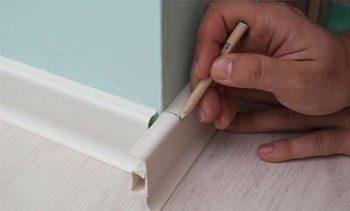
The master makes many measurements "by eye" or "in place", applying the panel to the desired point. Thus, he significantly saves time without sacrificing quality. After all, most of the cut edges will be masked by the baseboard, and an error of half a centimeter will not play a role. However, for this you need to have a good idea of what and how should be cut off. If the contours have a complex shape or the end remains open, you need a measuring tool.
Most often used for this:
- pencil
- roulette,
- elbow
- template for adjusting the width of the panels,
- template for transferring (copying) contours.
Pencil
Marking is done, as a rule, with a pencil or marker. To increase accuracy, it is advisable to take into account the thickness of the lead (rod), and make the marks thin, neat. And often they have to be redrawn, so you should not put pressure on the pencil. By the way, for the same reason, a professional installer tries not to use ordinary markers or felt-tip pens.
Useful: markers and felt-tip pens can be easily erased.
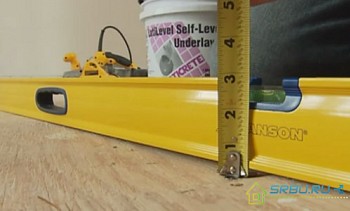
Roulette and square
Roulette and square are simple popular tools that are often found on the farm. Their features are associated with the brand of the manufacturer and are important only for large volumes of work or in special cases. However, some functions are still quite useful. For example - a tape measure tape clamp, as well as guides for marking an angle of 45 °, provided by the design of the square.Nevertheless, amateur roulette 3-5 meters long and any square, even a school one, will go for the house.
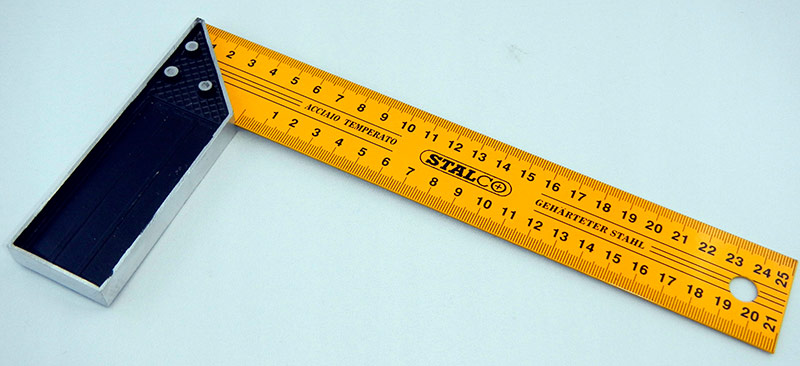
The square.
Note: a rectangular sheet of paper or cardboard folded diagonally is quite capable of becoming a square. Moreover, it will allow not only 90, but also 45 °.
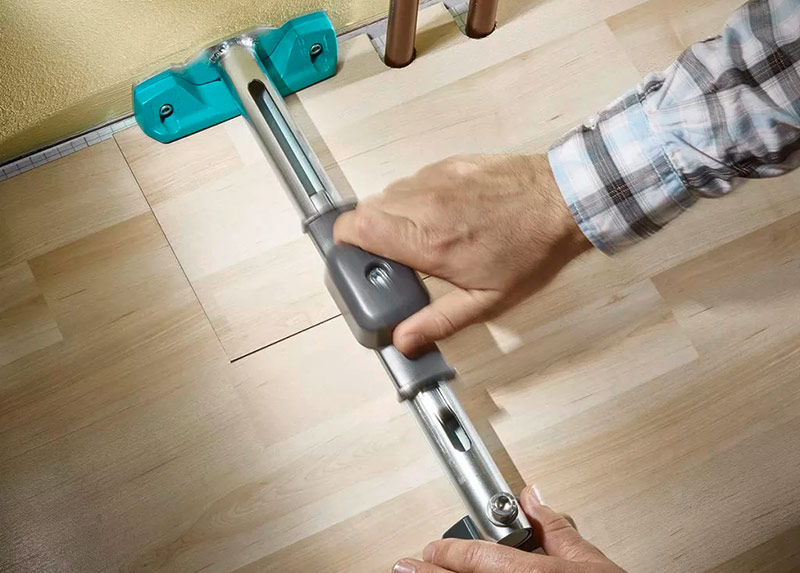
Laminate width template
Fitting the last row (longitudinal marking and section) sometimes causes difficulties, especially for an inexperienced master. Their reasons are the need to take into account the compensation gap, the curvature of the walls, as well as the likely confusion associated with the location of the end locks. A template for width adjustment is a tool for a laminate that eliminates such difficulties. It is a rigid rail-ruler with a length of about 300 mm with two moving carriages. One of them is a guide, and the second - marking out, with a hole for a pencil and a clamp.
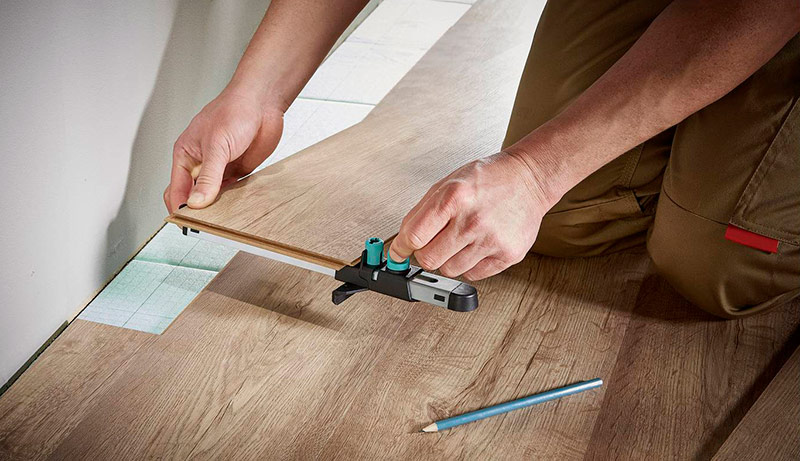
The template for fitting the laminate in width.
Operating principle:
- The panel is placed face up on an already laid laminate, combining the edges, and a template is placed on top, perpendicular to the wall.
- The guide carriage rests against the end of the processed lamella, and the end of the template rests against the wall.
- The marking carriage is set according to the width of the board and the gap, and then fixed.
- A pencil or marker is inserted and fixed into the hole.
- The pattern is moved along the board.
- As the template advances, it moves relative to the guide carriage, which approaches or moves away from the wall, depending on the curvature.
- Thus, the pencil moves with the template, exactly copying the line of the wall.
If the template is not at hand or in the store, you can deal without it. But in this case, errors, damage to the material, a waste of time are likely. To perform this work, the panel is placed face down, pressing it against the wall, taking into account the gap. Then, focusing on the edge of the stacked row, mark the ends of the board. It remains only to connect them using a long straight rail or another panel, and then saw off. Before sawing, it is advisable to attach the lamella to the wall, imagining what it will be after cutting.
Important: a compensation gap of 0.8-1.5 cm wide is required, because the laminate will probably move or swell over time.
Template for copying outlines
Pipes and other elements protruding from the floor greatly complicate the installation of the laminate. After all, under them you need to cut out grooves, which can not always be masked. But first you need to mark them up. This problem is solved using a template for copying contours.
The template consists of two flat rails connected “flat”, but with a gap. The gap is filled with thin plates standing at the ends, capable of moving. The device is also equipped with a plate retainer and a guide beacon, which serves as a guide for transferring lines.

Template for copying outlines.
Operating principle:
- The template is placed on the floor, rested in a pipe, under which a groove is needed.
- Thin plates are pressed into the tube while advancing from the back.
- Guided by the guiding beacon, a mark is placed on the board.
- Then a template is set up according to this mark and a pipe outline is drawn with a pencil, resulting from a shift of the plates.
There is no full replacement for this device. Therefore, if it is not available in the nearest store, you will have to mark the grooves “by eye”. Sometimes a cardboard or paper template helps, fitted "in place" as a result of several attempts.
Please note: special decorative rings, dressed on a pipe, reduce the importance of accurate marking.
Laminate cutting and processing tools
Sawing, trimming, grooving and drilling boards is perhaps the most time-consuming part of the job. Probable difficulties are associated with those places that remain open, for example - near pipes or door trims. Therefore, the availability of cutting tools is so important.
Tools used for processing laminate flooring:
- hacksaw,
- cutter,
- jigsaw
- a circular saw,
- drill and drill,
- plane.
Laminate Hacksaw
Since the base of the laminate is similar to wood, it can be sawn with an ordinary hacksaw. However, a saw with a large tooth chips the laminated layer, spoiling the appearance of the lamella. For this work, a fine-tooth “spike” is used, in which a weak, almost imperceptible, tooth bite. The edge is clean, and a wide hacksaw blade helps to get a direct cut. But the low quality studs are sawed hard, quickly dulling, so you need to buy an expensive model.
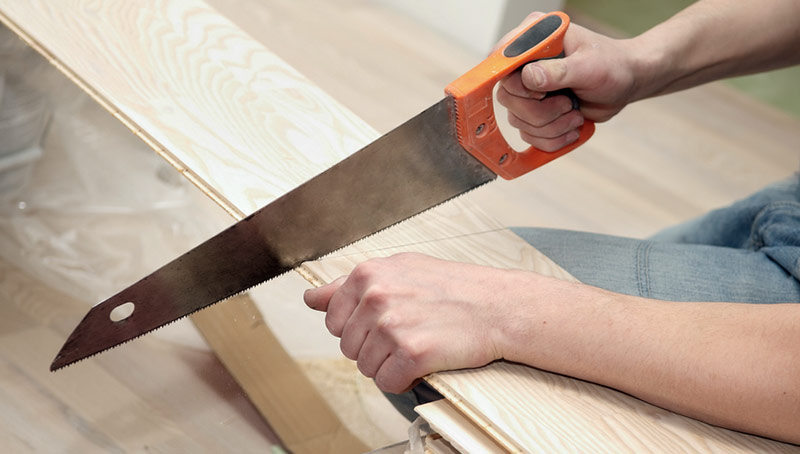
Hacksaw for laminate (studding).
Note: if you adapt to saw from the rough side, you can use a hacksaw with a large tooth, for example, "Kremlin". It is sawn easily and quickly, and almost no chips remain.
Laminate cutter
There are two modifications of cutters for a laminate - a “hybrid” of a tile cutter and a guillotine, as well as a “clean” guillotine. The first option is suitable only for cutting panels across, and almost does not deserve attention. But the guillotine does the job easily, naturally, quickly, cleanly and silently.
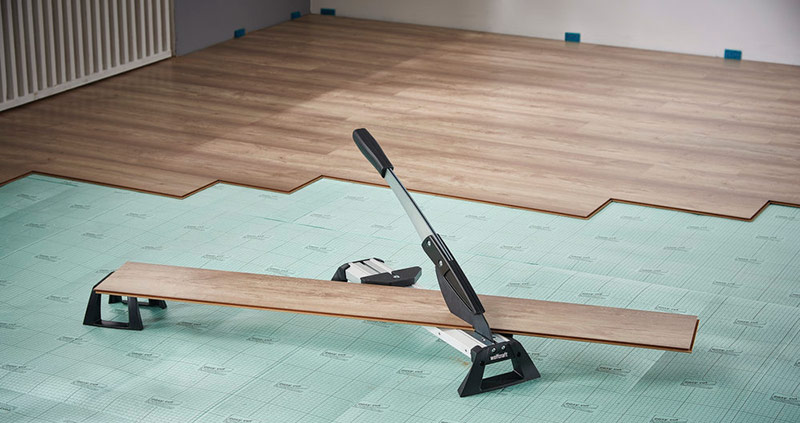
Laminate cutter.
It represents a bed about a meter long, at the end of which a rising wide blade is fixed. Small cloves go along its edge, and a long lever handle is fixed on top. The handle with the blade is lifted, then the panel is laid and pressed with uniform force. In this way, longitudinal sections can also be made.
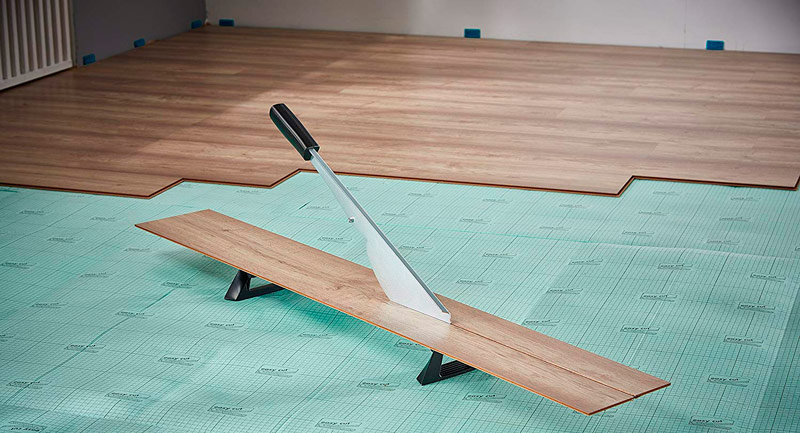
A longitudinal section of a laminate lamella using a cutter.
Useful: a cheap tool quickly dulls, and sharpening it is not so simple.
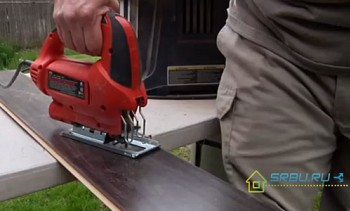
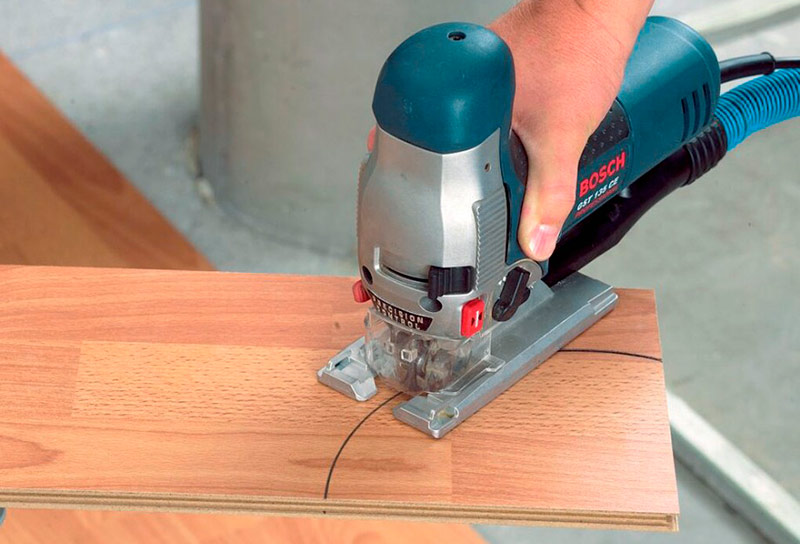
Jigsaw
An electric jigsaw is the most popular tool for sawing any wooden workpieces up to 5 cm thick. It is a compact case with a convenient handle, button and file attachment mechanism. The file makes translational movements, because of which, in fact, sawing occurs.
Features of the electric jigsaw:
- if the file is new, it performs its function perfectly;
- for a curly cut, use a narrow file with a very small tooth;
- for a direct cut, you can choose a larger file;
- for a laminate, files with the opposite direction of the cutting edge of the teeth are recommended (the cut is more accurate), however, it is harder to saw with them than usual.
Modifications of jigsaws are equipped with a pendulum mode, backlight, speed control and other “chips”. The most useful addition is the pendulum mode. This is a sign of “professional affiliation” of the device, because it is rarely found on cheap household samples. Its meaning is that the file moves not only up and down, but also slightly back and forth. Thus, productivity increases dramatically, but cut quality decreases. True, it is turned on by the regulator, so it is not always used.
Please note: the main drawback of jigsaws is the narrow saw blade, due to which it is almost impossible to make the cut perfectly even along the entire length.
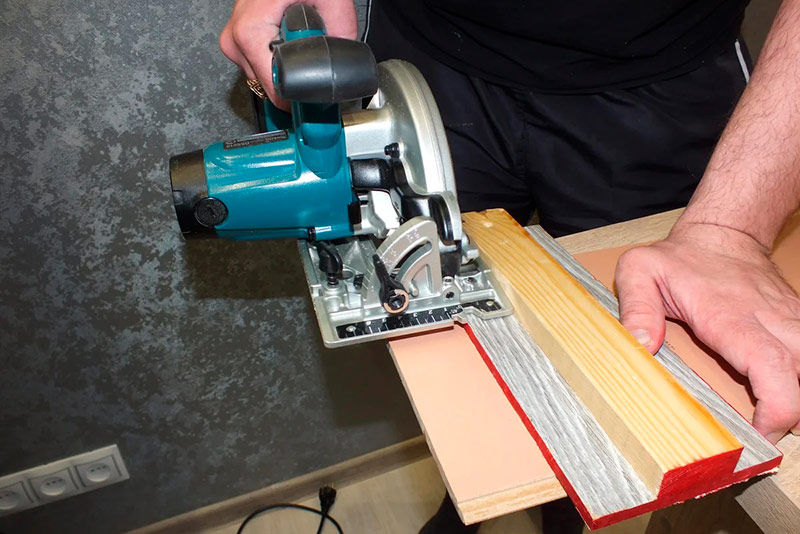
A circular saw
A hand-held circular saw (“frog”), as well as a floor “crosscut” are popular carpentry tools. Their principle of operation is based on the rotation of the toothed disk, covered with a protective casing on top. These units are usually very noisy, and the dust from them flies in all directions. Therefore, their design often provides a pipe for connecting a vacuum cleaner. The disadvantages of circular saws also include the impossibility of curly cuts and high danger. But the cut is as fast as possible, and the cut is perfectly straight and without chips.
Useful: an angle grinder (grinder) with a wood disc is as effective as a “frog”, but much more dangerous and “dirtier”.
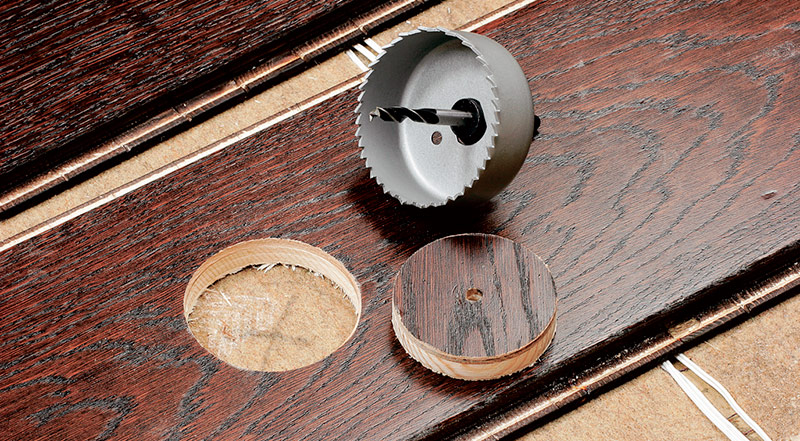
Drill
Drilling any boards or panels is simple, quick. When laying a laminate, it is required when grooves for pipes or other openings are needed. True, they can be cut with a jigsaw, but it will be much longer, and the result will be worse. In addition, if the marking is done accurately, fitting after drilling will not be needed.
Pressed wood fibers can be drilled with any drill. However, you need to consider the size of the holes, which is sometimes significant.Then it is advisable to use a feather or crown drill. In any case, the edge is of high quality.
Important: do not forget about the compensation gap near the pipes. Here it is usually 2-5 mm.
Plane
The well-known plane is an optional accessory. However, the fitting of the cut ends is significantly accelerated and simplified when it is at hand. In addition, they can be chamfered if the edge remains open, as well as cut the lock. Sometimes only he interferes with the installation of the panel, and sawing off the lock with a jigsaw or, especially, with a circular - is an extra hassle.
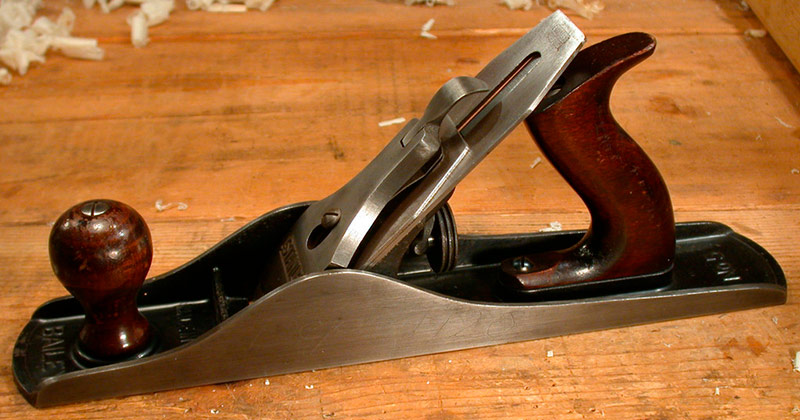
Note: working with a plane on the ends of the lamellas is much easier if you periodically change the angle of the tool.
Tools for mounting laminate flooring
The complexity of laying depends primarily on the quality of the material. Ideally, the boards should be assembled without the use of a “shock” technique - inserted at the right angle, lowered, crushed. If everything is done correctly, installation of even inexpensive samples almost does not require the use of a hammer.
Nevertheless, it is worth preparing the whole set:
- plastic wedges
- laminate clamp,
- mounting bracket
- hammer (mallet),
- shock bar.
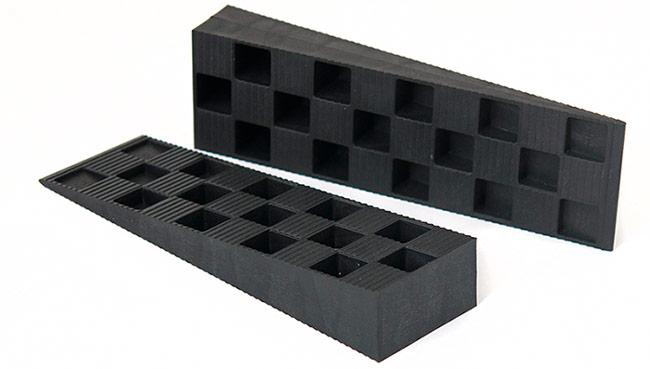
Plastic wedges
Wedges are gaskets between the laminate and the wall, the thickness of which determines the width of the compensation gap. They can be factory plastic or homemade from any material, the same trim panels, for example. But factory products are still more convenient. After all, their shape allows you to quickly change the gap, but they themselves do not fall out and do not shift.
Laminate Clamp
Clamps in this case are devices designed to seal the joints of panels. They are different, but two modifications are popular - with suction cups and straps. The first option is used by “gluing” the suction cups to the second or third row from the wall, inserting the emphasis into the gap and tightening the rows.
Clamp for laying laminate flooring.
The clamp with straps resembles an ordinary winch. There are stops at both ends of the belt and a tightening mechanism between them. By installing several such devices, you can firmly seal the entire laid coating. Thus, gaps in the joints will be practically eliminated.
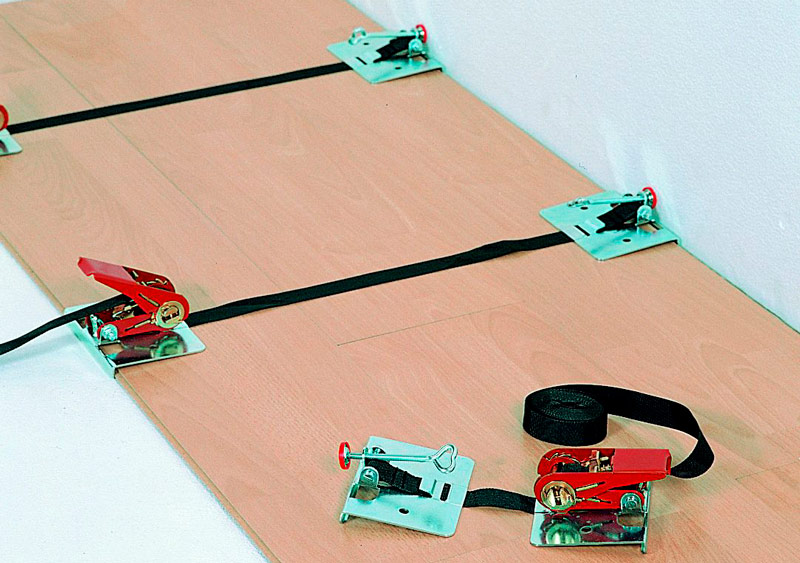
Clamp with straps for laying laminate.
Mounting bracket
The bracket is also sometimes called a clamp, although the principle of operation here is completely different. This is just a Z-shaped steel plate, one bend of which is inserted into the gap, and the second one is beaten with a hammer. Thus, the joint closest to the wall (longitudinal or transverse) is qualitatively compacted. Advantages of a bracket: compactness, simplicity, efficiency, speed of use.
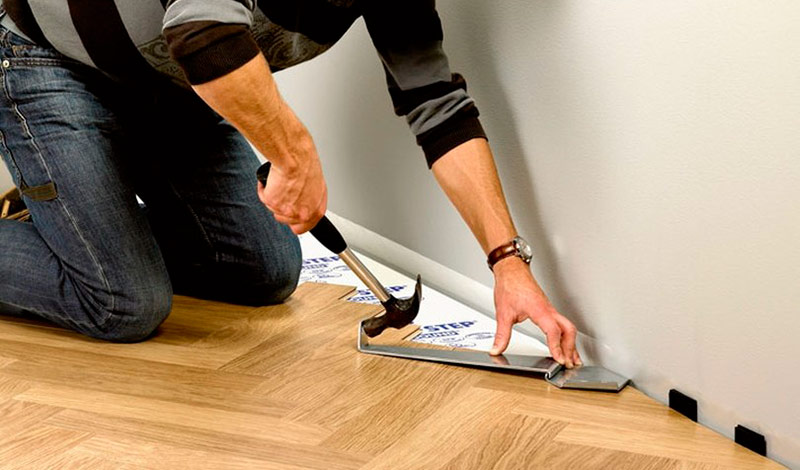
Staple for laying laminate.
Shock bar
Impact bar is a compact device that allows you to strike at the laminate from the end, without leaving damage. Its edge, mating with the panel lock, is partially similar in design to it, so the pressure is evenly distributed. Such bars are made of solid wood or durable plastic. A home-made replacement is a piece of lamella, the shape of which fully or partially corresponds to the place where it is applied.
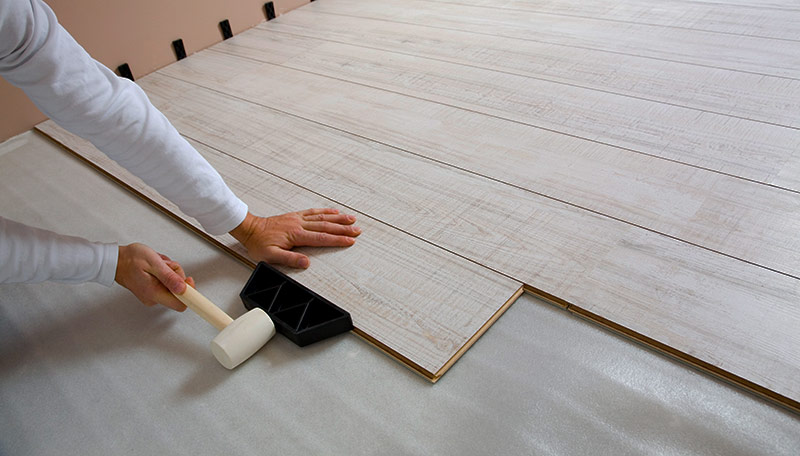
Impact block for laminate flooring.
Important: the use of clamps, staples, clamps and bars contributes to damage to the locks of the installed panels. After all, they transmit significant, but poorly controlled pressure.
Hammer
The well-known hammer is a useful universal tool. Of course, you should not strike them with lamels, but you can use gaskets, bars, etc. The mallet is not very convenient here because of its massive shape. But a random hit, most likely, will not leave damage.
If you need to lay the laminate only in your house or apartment, then it is advisable to purchase a set of tools for laying the laminate. Typically, this set includes spacer wedges and a mounting bracket. In most cases, these tools are quite enough. Other tools are more interesting for professional installers.
Skirting Tools
The material from which the walls and partitions are built determines the tools necessary for mounting the baseboard. In a wooden house, for example, you can handle self-tapping screws and a screwdriver. In most cases, you have to drill (drill) in the walls of the hole. Therefore, to install the skirting board you will need:
- hammer drill or impact drill (screwdriver) for drilling,
- screwdriver for screwing in screws,
- hacksaw for metal.
A vacuum cleaner is also useful, because the debris resulting from drilling remains inside the baseboard. Of course, you can wash it from there with a rag or sweep it with a broom, but the vacuum cleaner is much more convenient and productive. A tape measure and a knife are practically not needed, because it is better to saw the baseboard with a hacksaw, and measure it in place.
Hammer or hammer drill
No matter how great the desire to save, an impact drill is not an alternative to a hammer drill. She will help out when you need one or two holes in brick or plaster. But a completely different thing, if you need a lot of holes in concrete.
An expensive branded hammer drill will theoretically handle. However, it is better to save such a tool, taking, for example, a perforator for rent. The performance of the device depends on the class and power, but this work will not overload it. Therefore, by controlling the heating, you can use the usual household model.
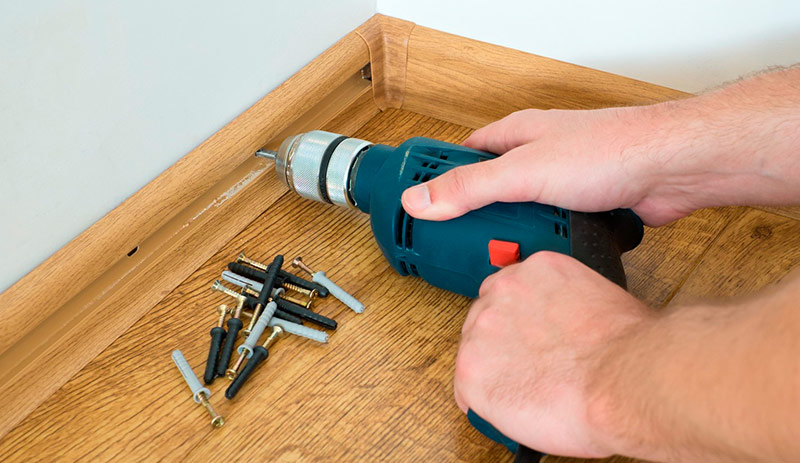
Plinth mounting.
Drills on concrete for a punch (drill) can vary greatly in length, diameter, and appearance of the tip. However, the rule here is simple - the drill must match the dowel. That is, to coincide with it in diameter, but to be a little longer. For example, for a dowel-nail 6 * 40 mm, a drill 6 * 110 mm is used. Its working length is 50-60 mm, and the rest is a shank. By the way, the shank of the drill is chosen, starting from the model of the punch. The most popular type of shank is “SDS +”.
Important: drills often “burn out” when they rest against reinforced concrete products. Therefore, if there is a feeling that the deepening has stopped, you need to start drilling a new hole or try to change the inclination of the drill.
Screwdriver
Installation of skirting boards is a job that does not require special efforts from a screwdriver. Sometimes, if not screws are used, but a dowel-nails, there is absolutely nothing to twist. In such a situation, even a simple screwdriver, taken just in case, will help out. A cordless screwdriver is obviously more convenient.
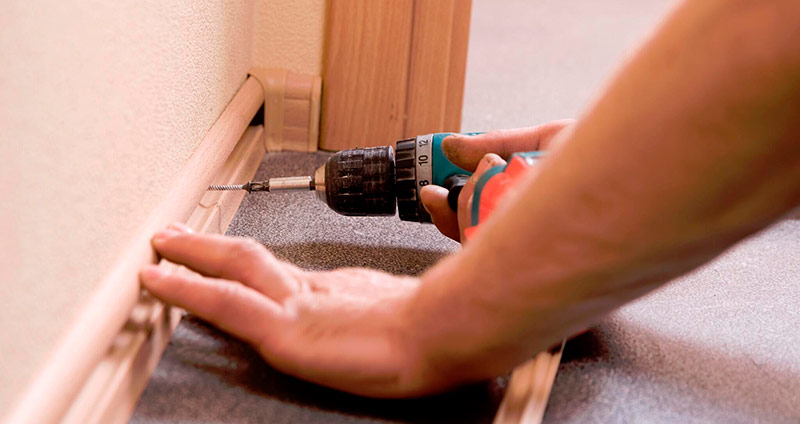
Plinth fastening with a screwdriver.